Solar Eclipse Photography: Tips, Settings, Equipment and Photo Guide
Eclipse sequence

If you're thinking of photographing the total solar eclipse on July 2, 2019, check out this guide from eclipse photography experts Imelda Joson and Edwin Aguirre. Here is a photo guide with some of Joson and Aguirre's work, and tips for getting the perfect shot.
This panel shows the various stages of the solar eclipse. The so-called diamond ring marks the beginning of totality (third from the left) and the end of totality (third from the right). Joson and Aguirre assembled this sequence from individual still frames they took of the March 29, 2006, total solar eclipse near El Salloum, Egypt.
Image scale for DSLR cameras
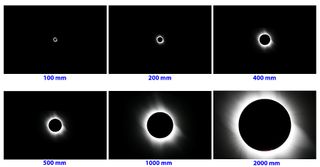
Joson and Aguirre created this photo illustration, which is adapted from the diagram by Fred Espenak, an astrophysicist emeritus at NASA's Goddard Space Flight Center who specializes in eclipse predictions (earning him the nickname "Mr. Eclipse"). The diagram shows how the size of the sun's image varies in the frame of a digital single-lens reflex (DSLR) camera with a full-frame (35-mm format) sensor, depending on the focal length of the telephoto lens or telescope used. In DSLRs with smaller, APS-C sensors, the relative size of the solar image will appear about 1.6 times larger because of the cropping of the camera's field of view. As a result, you can use a lens of shorter focal length to produce the same image scale of the sun as in the full-frame version.
White-light photography setup
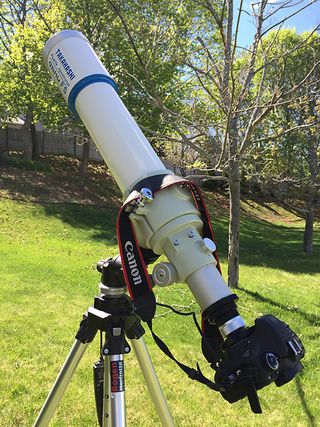
To image the sun in "white light" (plain visible light), Joson and Aguirre use a DSLR camera coupled with a 3-inch (7.6-centimeter) apochromatic refractor telescope (apochromatic telescopes use special glasses to eliminate color fringes in the image). The telescope is shown fitted with a safe solar filter, in this case, a metal-coated glass filter, on the front (objective) end. This setup is ideal for capturing the partial phases of the eclipse. A solar filter is necessary only when any portion of the sun's disk is visible. At the start of totality, sky watchers can remove their solar filters (and solar viewing glasses). But be sure to immediately replace the solar filter (and solar viewing glasses) once totality ends.
Related: How to View a Solar Eclipse Without Damaging Your Eyes
Helpful imaging accessories
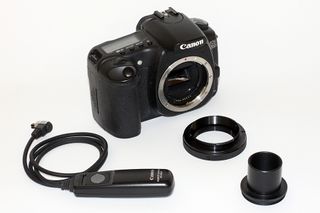
The best way to attach your DSLR camera body securely to the telescope focuser is to use an appropriate T-ring for your camera brand (check with your local camera retailer) and a 1.25-inch (3.2 cm) nosepiece adapter. To minimize vibrations, use an electronic cable release to operate the shutter.
Point-and-shoot digital cameras
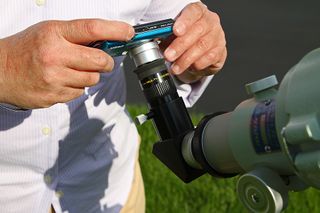
If you don't have a DSLR camera, don't worry — you can use your automatic point-and-shoot pocket camera to take decent pictures of the partial eclipse through a properly filtered telescope. With the solar filter mounted securely to the telescope, insert a wide-field eyepiece, and hold the camera lens close to it. Use the camera's built-in LCD screen to center the sun. Zoom in as needed. WARNING: Attempting to photograph the sun without a proper solar filter can cause eye damage, and can also ruin your telescope and/or camera.
Smartphone eclipse photography
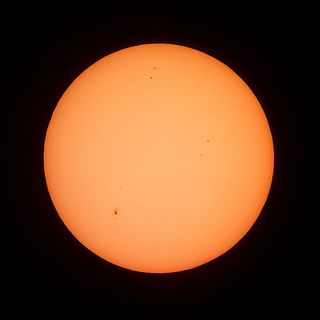
You can also use your smartphone camera or other mobile devices to take decent shots of the partial eclipse through a solar-filtered telescope. That way, you can text, email or share those images with friends via social media. Joson and Aguirre captured this snapshot of the sun using a Samsung Droid Charge smartphone's 8-megapixel camera. They held the phone over the eyepiece and used the camera's autofocus and auto-exposure modes to take the shot. Note the tiny sunspots visible on the solar disk.
Smartphone telescope adapter
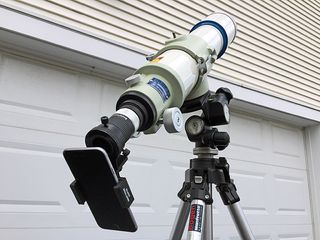
A better and steadier way to secure your smartphone to the telescope eyepiece is to use a commercial bracket to attach the phone to the eyepiece. Shown here is the Smart Phone Adapter from Meade Instruments, which can accommodate several models of the iPhone 6 and Samsung Galaxy, and retails for $19.99. Do-it-yourselfers can 3D-print their own homemade brackets.
Get the Space.com Newsletter
Breaking space news, the latest updates on rocket launches, skywatching events and more!
Solar projection method
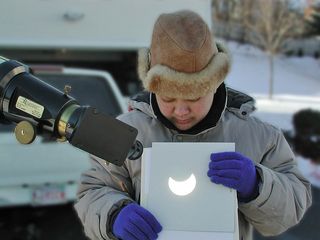
The simplest and safest way to observe the partial stages of the eclipse is with a pinhole camera. The tiny solar image projected by the pinhole onto a shaded white piece of cardboard will be safe to look at. You can also use your unfiltered telescope (or one side of your binoculars) to project a magnified image of the sun's disk onto the cardboard that you can safely view and photograph. Be sure to cover the telescope's finder scope and the unused half of the binoculars, and do not let anyone look through them. This scene was taken in the suburbs of Boston during the partial solar eclipse on Dec. 25, 2000.
A very long total solar eclipse
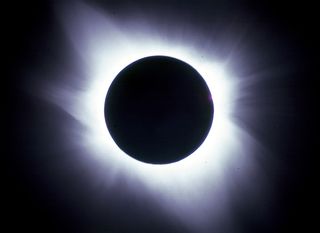
During totality, the sun's outer atmosphere, called the corona, blazes forth in all its glory. Joson and Aguirre captured this view of the corona on July 11, 1991, along the eclipse track's central line in Baja California Sur, Mexico. Their observing site was located in Cabo Pulmo, a small coastal community facing the Gulf of California and situated northeast of Cabo San Lucas. The duration of totality there was an incredible 6 minutes and 53 seconds, with the sun 83 degrees high in the sky. (The point directly overhead from the horizon, called the zenith, is 90 degrees.) That was the longest total solar eclipse that Imelda and Edwin will ever get to see in their lifetimes. They used a Meade 1,000-mm f/10 Schmidt-Cassegrain telescope and a Nikon F2A manual SLR camera for this 1-second exposure on 35-mm Kodachrome 200 slide film.
Blackout over the Caribbean Sea
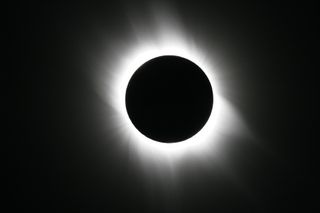
Joson and Aguirre photographed the total solar eclipse of Feb. 26, 1998, in the Caribbean Sea, between Aruba and Curaçao, from the deck of the MS Veendam, a Holland America Line cruise ship. They enjoyed being immersed in the moon's dark shadow for nearly 3 minutes and 43 seconds, with the sun about 61 degrees high in the sky. Imelda and Edwin used a Meade 1,000-mm f/10 Schmidt-Cassegrain telescope and a Nikon F2A manual SLR camera loaded with 35-mm Kodak Royal Gold 400 color print film.
Last total solar eclipse of the 20th century
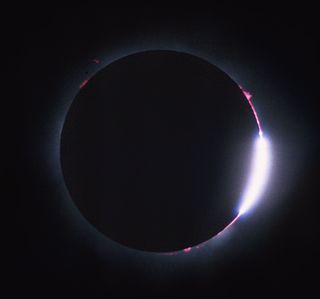
From a crowded mountaintop in Harput, Turkey, Joson and Aguirre captured this view of the sun disappearing behind the moon on Aug. 11, 1999, using a Meade 1,000-mm f/10 Schmidt-Cassegrain telescope and a Nikon F2A manual SLR camera loaded with 35-mm Kodachrome 200 slide film.
Spectacular Baily's beads
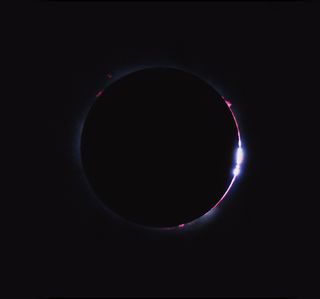
As the sun's brilliant edge disappeared behind the moon's rugged limb, beads of sunlight shone briefly through deep lunar valleys during the 1999 eclipse in Turkey. The effect is known as "Baily's beads," after English astronomer Francis Baily, who explained the phenomenon in 1836. Note the neon-pink prominences around the moon's silhouette in this photo by Joson and Aguirre.
Chromosphere and inner corona
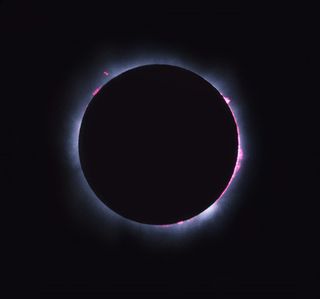
Totality lasted 2 minutes and 10 seconds in Harput, Turkey, in 1999, with the sun 53 degrees high in the sky. In this photo snapped by Joson and Aguirre, the pitch-black lunar disk is outlined by the soft bluish glow of the inner corona as well as the pink chromosphere layer and solar prominences (the large, bright features protruding from the sun's surface).
First total solar eclipse of the new millennium
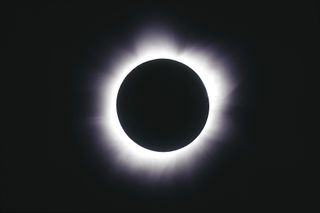
A long total solar eclipse — the first of this millennium — crossed southern Africa on June 21, 2001. Joson and Aguirre photographed the event along the eclipse path's central line, at a private farm outside Lusaka, Zambia. The duration of totality at the site was about 3 minutes and 35 seconds, with the sun 31 degrees in the western sky. Imelda and Edwin used a Meade 1,000-mm f/10 Schmidt-Cassegrain telescope and a Nikon F2A manual SLR camera loaded with 35-mm Kodak Royal Gold 400 color print film for this portrait of the corona, which exhibited a circular outline that is typical of the sun's outer atmosphere during maximum activity in the sunspot cycle.
Diamond ring, 2006 in Egypt
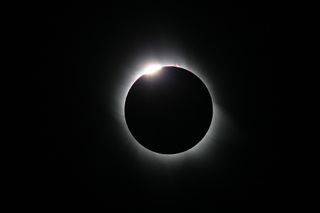
For the March 29, 2006, total solar eclipse, Joson and Aguirre traveled to Egypt, near the border with Libya. They observed the event from the Libyan Plateau, which overlooks the Egyptian city of El Salloum and the Mediterranean Sea. This view shows the diamond ring at second contact, which marked the start of the nearly 4-minute-long totality. Imelda and Edwin's imaging setup consisted of a Canon EOS 20D DSLR camera attached to a Takahashi FS-78 f/8 apochromatic refractor, which was fitted with a Thousand Oaks Optical solar filter and mounted on a Meade LXD75 equatorial mount. The exposure time was 1/800 of a second at ISO 400.
Close-up of prominences, March 2006
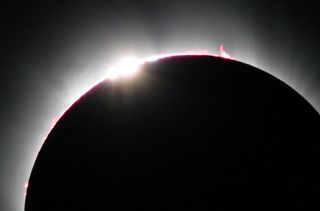
Joson and Aguirre took this close-up view of the solar prominences protruding from behind the moon's disk during the March 2006 eclipse in Egypt. The exposure time was 1/800 of a second at ISO 400.
Single exposure of the corona, March 2006

Totality lasted 3 minutes and 57 seconds near El Salloum, Egypt, with the sun 62 degrees high in the sky. This is a single 1/60-second exposure of the corona at ISO 400 taken by Joson and Aguirre in March 2006.
Corona composite, March 2006
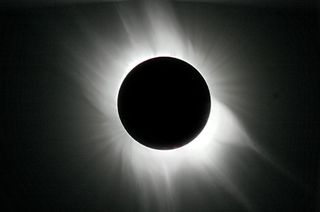
Joson and Aguirre used Adobe Photoshop to digitally combine three separate exposures of the March 2006 eclipse (1/800, 1/60 and 1/30 second at ISO 400) to bring out structural details in the corona. The corona's long equatorial streamers and fine polar brushes are typical of the sun at minimum activity in the 11-year sunspot cycle.
Second diamond ring, March 2006
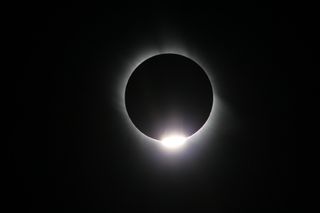
The diamond ring at "third contact," or the moment when totality ends. Joson and Aguirre captured this view from Egypt in 2006. The exposure time was 1/800 of a second at ISO 400.
Eclipse crowd, March 2006
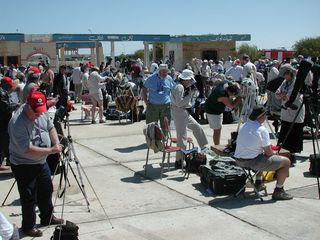
More than 1,000 eclipse enthusiasts from all over the world gathered near El Salloum, Egypt, to witness the March 29, 2006, total solar eclipse. Observers of the Aug. 21, 2017, total eclipse may experience similar overcrowding at popular tourist spots along the eclipse track, not to mention monstrous traffic jams on major highways and bridges on eclipse day.
Corona, July 2010
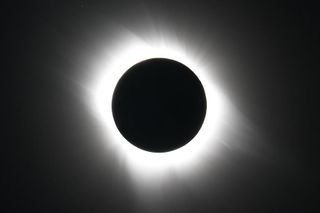
No two total eclipses look exactly alike; each one has its own "personality." During the July 11, 2010, eclipse, totality lasted 4 minutes and 35 seconds over Tatakoto atoll, a tiny coral island in the South Pacific that is part of French Polynesia's Tuamotu archipelago. At that time the sun was positioned 36 degrees above the island’s lagoon. Joson and Aguirre overexposed the inner corona to help bring out the long, faint equatorial streamers and fine polar brushes, which are characteristic of the corona at minimum sunspot activity.
Diamond ring and prominences, July 2010
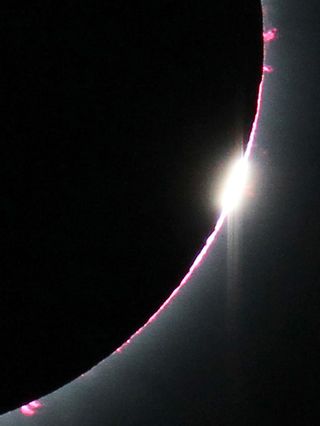
Joson and Aguirre captured this view of the diamond ring and prominences on July 11, 2010, from the Tatakoto atoll in French Polynesia's Tuamotu archipelago using a tripod-mounted Takahashi FC-60 apochromatic refractor and a Canon EOS 7D DSLR camera.
Diamond ring and prominences, July 2010
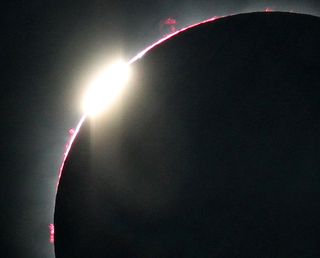
The sun reappears on the opposite side of the lunar disk, signaling the end of totality. Joson and Aguirre captured the moment in July 2010 using a Takahashi FC-60 apochromatic refractor and a Canon EOS 7D DSLR camera. You do not have to wait for a total solar eclipse to view solar prominences. You can enjoy watching and imaging them practically every clear day using a hydrogen-alpha telescope, such as Meade Instruments' PST and Coronado SolarMax II series.
Eclipse viewing, July 2010
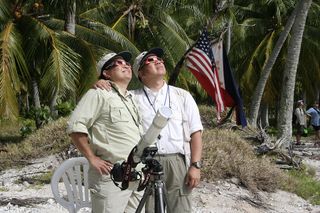
Regardless of whether there is an eclipse or not, you should always use a proper solar filter when gazing at the sun. Regular sunglasses and photographic polarizing or neutral-density (ND) filters are not safe for visual use on the sun. Here, Joson and Aguirre watched the sun's growing crescent through solar viewers after successfully witnessing totality on Tatakoto atoll in the middle of the South Pacific in 2010.
Coronado-iOptron H-alpha setup
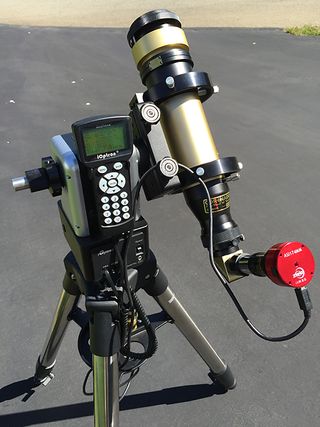
Joson and Aguirre's hydrogen-alpha imaging setup consists of a Coronado SolarMax II 60-mm double-stack telescope and a ZWO ASI174MM monochrome CMOS camera mounted on an iOptron AZ Mount Pro. A hydrogen-alpha solar telescope filters all but one specific wavelength of light emitted by the sun's hydrogen atoms, centered at 656 nanometers.
Hydrogen-alpha sun 1
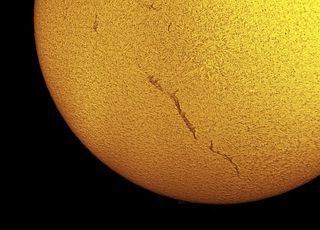
Joson and Aguirre captured a wealth of details in the sun's chromosphere on July 30, 2016, using the Coronado SolarMax II 60-mm double-stack telescope and a ZWO ASI174MM monochrome CMOS camera mounted on an iOptron AZ Mount Pro. They used FireCapture software to capture the frames, AutoStakkert!2 to stack them, RegiStax for wavelet processing and Adobe Photoshop CS6 for sharpening and colorizing the final image. Note the long, snake-like, dark filament that extended thousands of miles across the sun.
Hydrogen-alpha sun 2
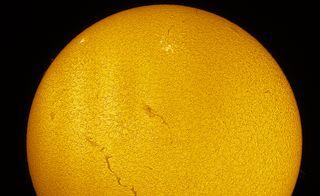
Joson and Aguirre obtained this hydrogen-alpha view of the sun on July 28, 2016, using the Coronado SolarMax II 60-mm double-stack telescope and a ZWO ASI174MM monochrome CMOS camera mounted on an iOptron AZ Mount Pro. In addition to the dark filaments, you can see small bright splotches on the sun, called plages, as well as wavy, hair-like structures called spicules.
Editor's Note: If you snap an amazing picture of the July 2, 2019 total solar eclipse and would like to share it with Space.com's readers, send your photos, comments, and your name and location to spacephotos@space.com.
Join our Space Forums to keep talking space on the latest missions, night sky and more! And if you have a news tip, correction or comment, let us know at: community@space.com.
Most Popular


