With Simple, Homemade Telescopes, You Can Explore the Stars (Op-Ed)
Victor Rogus contributed this article to Space.com's Expert Voices: Op-Ed & Insights.
One of my greatest joys in amateur astronomy has been in building my own equipment. The great Clyde Tombaugh originally inspired me to do this — a Kansas farmer's son, Tombaugh's plans for attending college were frustrated when a hailstorm ruined his family's crops. With no money for college, Tombaugh was devastated. His family was in survival mode, putting the young man's astronomy and mathematics intentions indefinitely on hold.
Tombaugh was not one to quit, however, so in 1926, he built several telescopes with lenses and mirrors he ground himself — on a fence post! From broken farm equipment, he built his own equatorial mount so his telescope could move with the rotation of the Earth. Tombaugh had no camera, but he was able to make highly detailed drawings at the eyepiece. The amateur astronomer recorded images of Jupiter and Mars in this way, and sent them to the Lowell Observatory, so impressing the astronomers there that they offered him a job. Tombaugh worked at the observatory from 1929 to 1945.
While there, he became involved in the search for Planet X — what we know today as the minor planet, Pluto.
To make the discovery, Tombaugh used a blink comparator to compare his photographic plates of the same star field taken at different times. With a blink comparator, if an object in the field moves back and forth it is something other than a star — an asteroid or comet, perhaps, or in this case, a newly discovered planet. [Your First Telescope: Stargazing Tips for Amateur Astronomers ]
Homemade astronomy
I feel it is a wonderful thing to free oneself from the "store-bought" world, as Tombaugh did, and to use your imagination and skills to develop your own, personal way of viewing the sky.
Get the Space.com Newsletter
Breaking space news, the latest updates on rocket launches, skywatching events and more!
Common objects around the house or available at the neighborhood hardware store can transform into tools to study the heavens. After following your own path like this, you realize there is no formula, no "cookie cutter" method — there is just the sky, your skills and imagination, and countless mysteries to solve. I have found this perspective to be liberating.
People often ask if I grind my own lenses and mirrors. I do not. This is an art in itself and time well spent. However, I prefer to purchase lenses and mirrors. Thanks to modern production techniques, I can cheaply obtain a better-quality piece than if I hand figured my own. I have great respect for those who wish to create their own lenses or mirrors, and consider this a worthwhile endeavor, but I feel my time is better spent elsewhere.
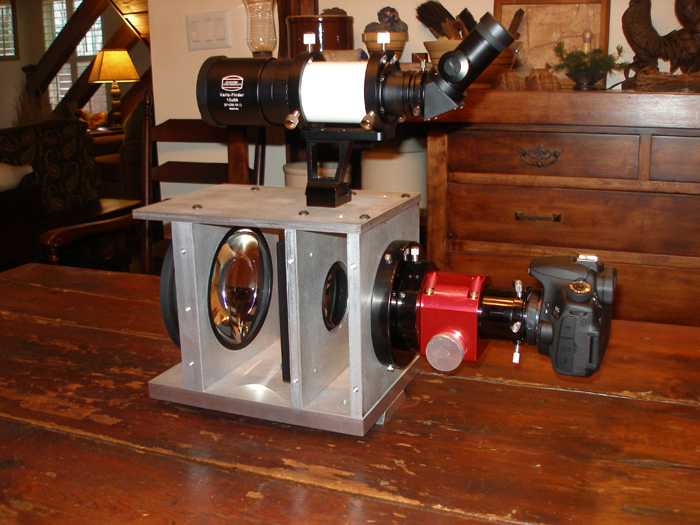
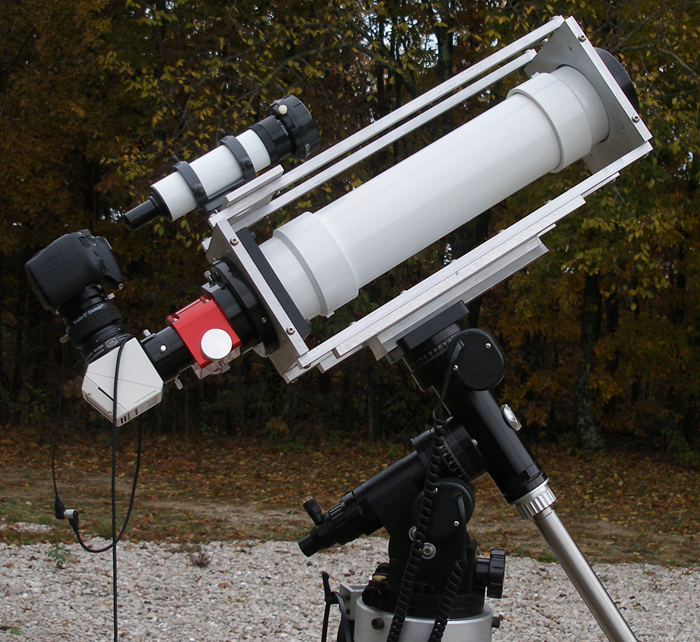
You can find amazing deals on lenses or mirrors on e-Bay and online surplus stores, like Surplus Shed. Once you obtain a lens, you can plan out the design for your own telescope. Since I save some money on these do-it-yourself projects, I like to splurge a bit on a nice focuser, though you can find plans for making your own online. The focuser is the part of the telescope that holds the eyepiece or camera, and by moving in or out, closer or farther from the instrument's mirrors or lenses, it brings a subject into final sharp focus.Designing and building your own can be highly rewarding — though you can also purchase many styles of focusers at varying costs.
In your final step, you will need to build your own equatorial, Alt Azimuth, Dobsonian or Fork mount. You can also modify an existing mount to fit your needs. A motorized mount compensates for the Earth's rotation, so that the view through the eyepiece remains centered on a desired target — a must for photography through the telescope.
Crafting a mount
There are many approaches to building such monuts. I once heard of a fellow, long ago, who devised a method dependent on sand slowly being released from a container (something like an hourglass) to slowly move his telescope in conjunction with celestial objects, and it worked!
Similarly, water was once used in the construction of astronomical clocks. These clocks gave not only the time, but also astronomical information as well. In the 11th-century, Chinese astronomer Su Song created such a clock that used water and an escapement mechanism. A motorized telescope mount is much like a clock as it compensates for the Earth revolving on its axis every 24 hours. The difference being, the more correct timing of the Earth's rotation, or sidereal time, is 23 hours and 56 minutes.
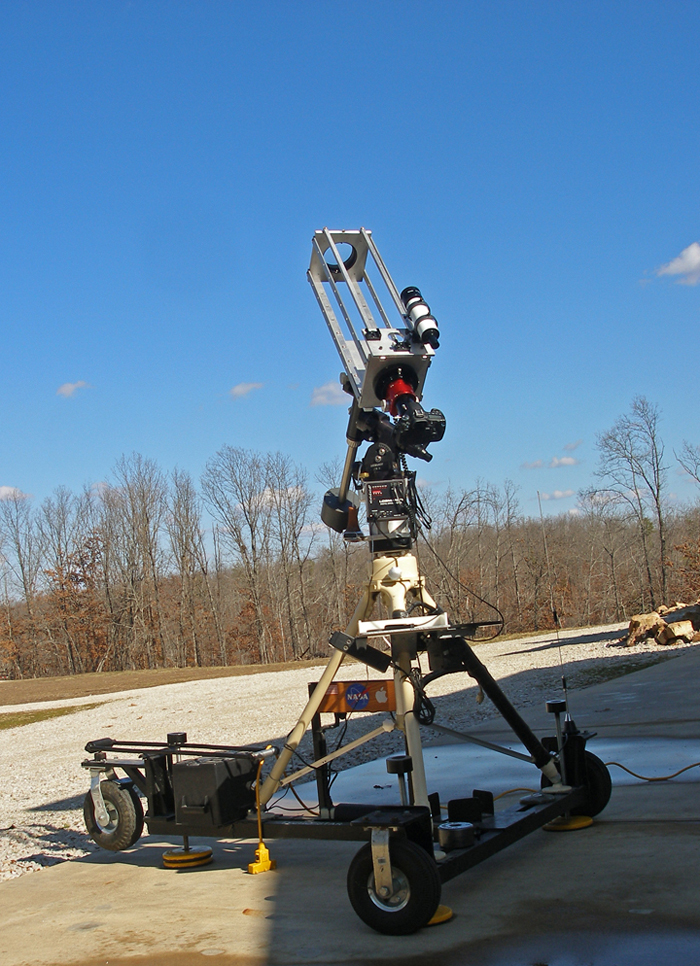
I have built mounts using rack-and-pinion gears that made wonderful images of the sky, at low to medium power. These worked great for capturing meteors and for viewing large objects like comets. Also see the "barn door" or "trap door" designs for camera trackers, as they are simple and work amazingly well. The barn door or trap door design can be as simple as two matching pieces of wood joined together at one end by a hinge. A length of threaded rod and a nut is used to "open" the top piece of wood as though it were the cover of a book. A camera is then mounted to the top piece of wood and a stepper motor or even a knob operated by hand is used to mimic the apparent motion of the stars. This simple homemade device will reduce star trails far better than if the camera was mounted on a tripod alone. This makes for better sky photographs as the exposure time can be lengthened, extracting more detail from the sky.
Exploring with your telescope
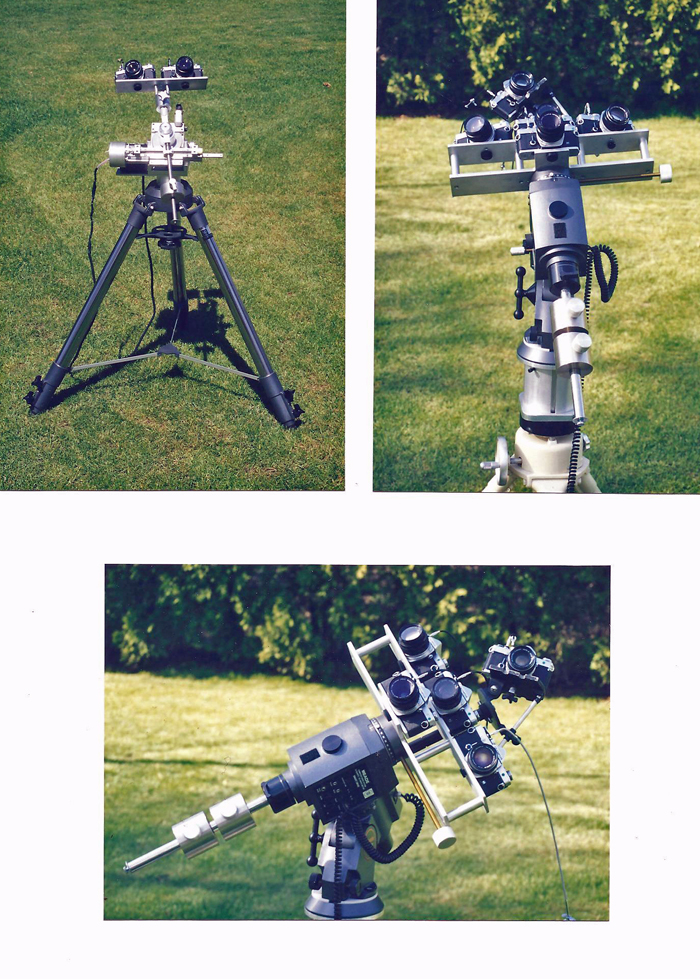
I enjoy photographing meteor showers, and I have found that modifications to existing equatorial mounts can make these instruments ideal for capturing meteors. Adjustments can enable the mounts to carry several cameras at once, so you can aim the cameras at different areas of the sky, or the same area using different filters. Back in the day, you could also use different films. Black and white film, as well as color film, could be used at various ASA (ISO) speeds to capture the same meteor trail in a different way, revealing different details of the meteor trail.
As your interest in amateur astronomy grows, consider picking up the old book "All About Telescopes" (Edmund Scientific Co., 1972), written by Sam Brown. This deceptively thin paperback holds an enormous wealth of information, designs and inspiring ideas for the home astronomer. It even shows how you can make a telescope from a common length of 2-inch x 4-inch (5 centimeters x 10 centimeters) pine board. It also shows you how to make and space light baffles and find focal lengths for the particular lens or set of mirrors you couple with your eyepiece or camera. You will learn to perform optical testing and so much more.

As you build your telescope, remember the perseverance of Clyde Tombaugh — and also remember Tycho Brahe, who made accurate measurements of the sky centuries ago using simple tools. Despite his unsophisticated equipment, Brahe discovered a supernova in the Cassiopeia constellation in 1572, some 30 years before the telescope was even invented!
Store-bought equipment can be excellent, and it may be the way to go for some people. But I say amateur astronomers do not need to buy the sky from anyone; it is free for all people to take and study in their own way. Building your own equipment can separate you from the formulated, prepackaged concept of what amateur astronomers and astro-photographers "should be" using. Be proud of your PVC pipe masterpiece, and you will be amazed what you can do.
The views expressed are those of the author and do not necessarily reflect the views of the publisher. This version of the article was originally published on Space.com.
Join our Space Forums to keep talking space on the latest missions, night sky and more! And if you have a news tip, correction or comment, let us know at: community@space.com.
Victor is an American amateur astronomer and a distinguished fellow of the Royal Astronomical Society in London elected to the society in 2014. He's enjoyed photographing and writing about the sky for more than three decades and had his work published in many online sites and publication such as Space.com, Live Science, Astronomy Magazine and many others. He loves to share my work and to see that of others. Victor is also now a member of the American Meteor Society!


