How to Snap Awesome Photos of Night-Sky Objects with Your Smartphone
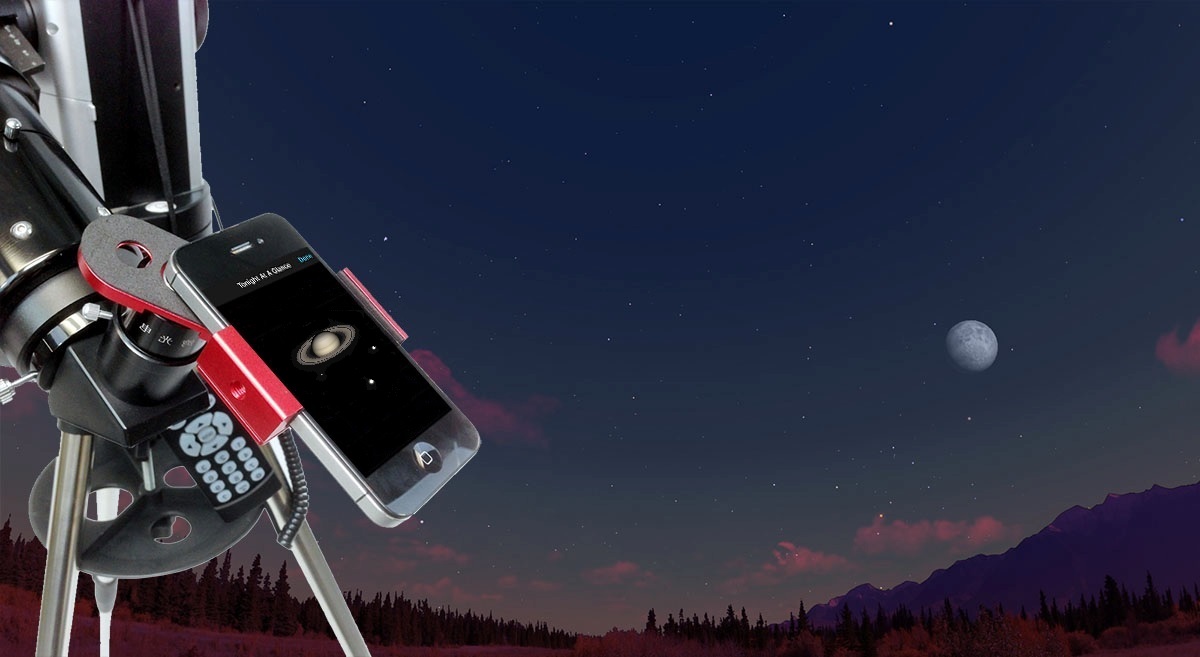
Just about everyone has a camera in their pocket these days, so why not use it to capture some celestial views? In this edition of mobile astronomy, we'll look at how you can take photographs of celestial bodies using the camera on your smartphone or tablet. These images certainly will not rival those from the Hubble Space Telescope, of course, or even an expert's photo taken with a digital single-lens reflex (DSLR) camera, but you'll have a wonderful memento to show your friends and share on social media.
In this introductory column, we'll cover how to take wide-field pictures of the sky, as well as still or video images of the moon and bright planets, through a telescope using your device's stock camera app. In future columns, we'll discuss some advanced techniques and special camera apps that let you try to capture views of deep-sky objects. (Our sister site, Tom's Guide, has a rundown of the best smartphone cameras, which you can see here.)
What is astrophotography?
An astrophotograph is an image of any celestial object. For our purposes, we'll include atmospheric phenomena, too, such as auroras, meteors and satellites. In the past, astrophotography was not for the faint of heart. Star trails and Milky Way pictures required long exposures, the latter on motorized mounts that follow the sky as the Earth rotates. You had to learn how to set the aperture and exposure settings, then shoot your images, sometimes for hours, and wait for the film to be developed and printed. [Gallery: Amazing Skywatcher Photos from Around the World]
Modern digital cameras allow us to see right away whether we have a worthy shot, and allow for instant feedback on settings and composition. The image sensors in mobile-device cameras vary greatly in pixel resolution, image size and other factors, but all of them offer full color images under a wide range of lighting conditions. We'll assume you're working with whatever camera your device already has. If you are shopping for a new device and want to try astrophotography with it, there are plenty of resources online for researching the differences among camera brands. Look for cameras with large pixel sizes (up to 2 micrometers), because they are more sensitive to low light and produce less-grainy images. You'll also benefit from platforms that allow manual camera control. Android devices tend to be more automated, while iPhone and iPad cameras allow more control.
The moon shot
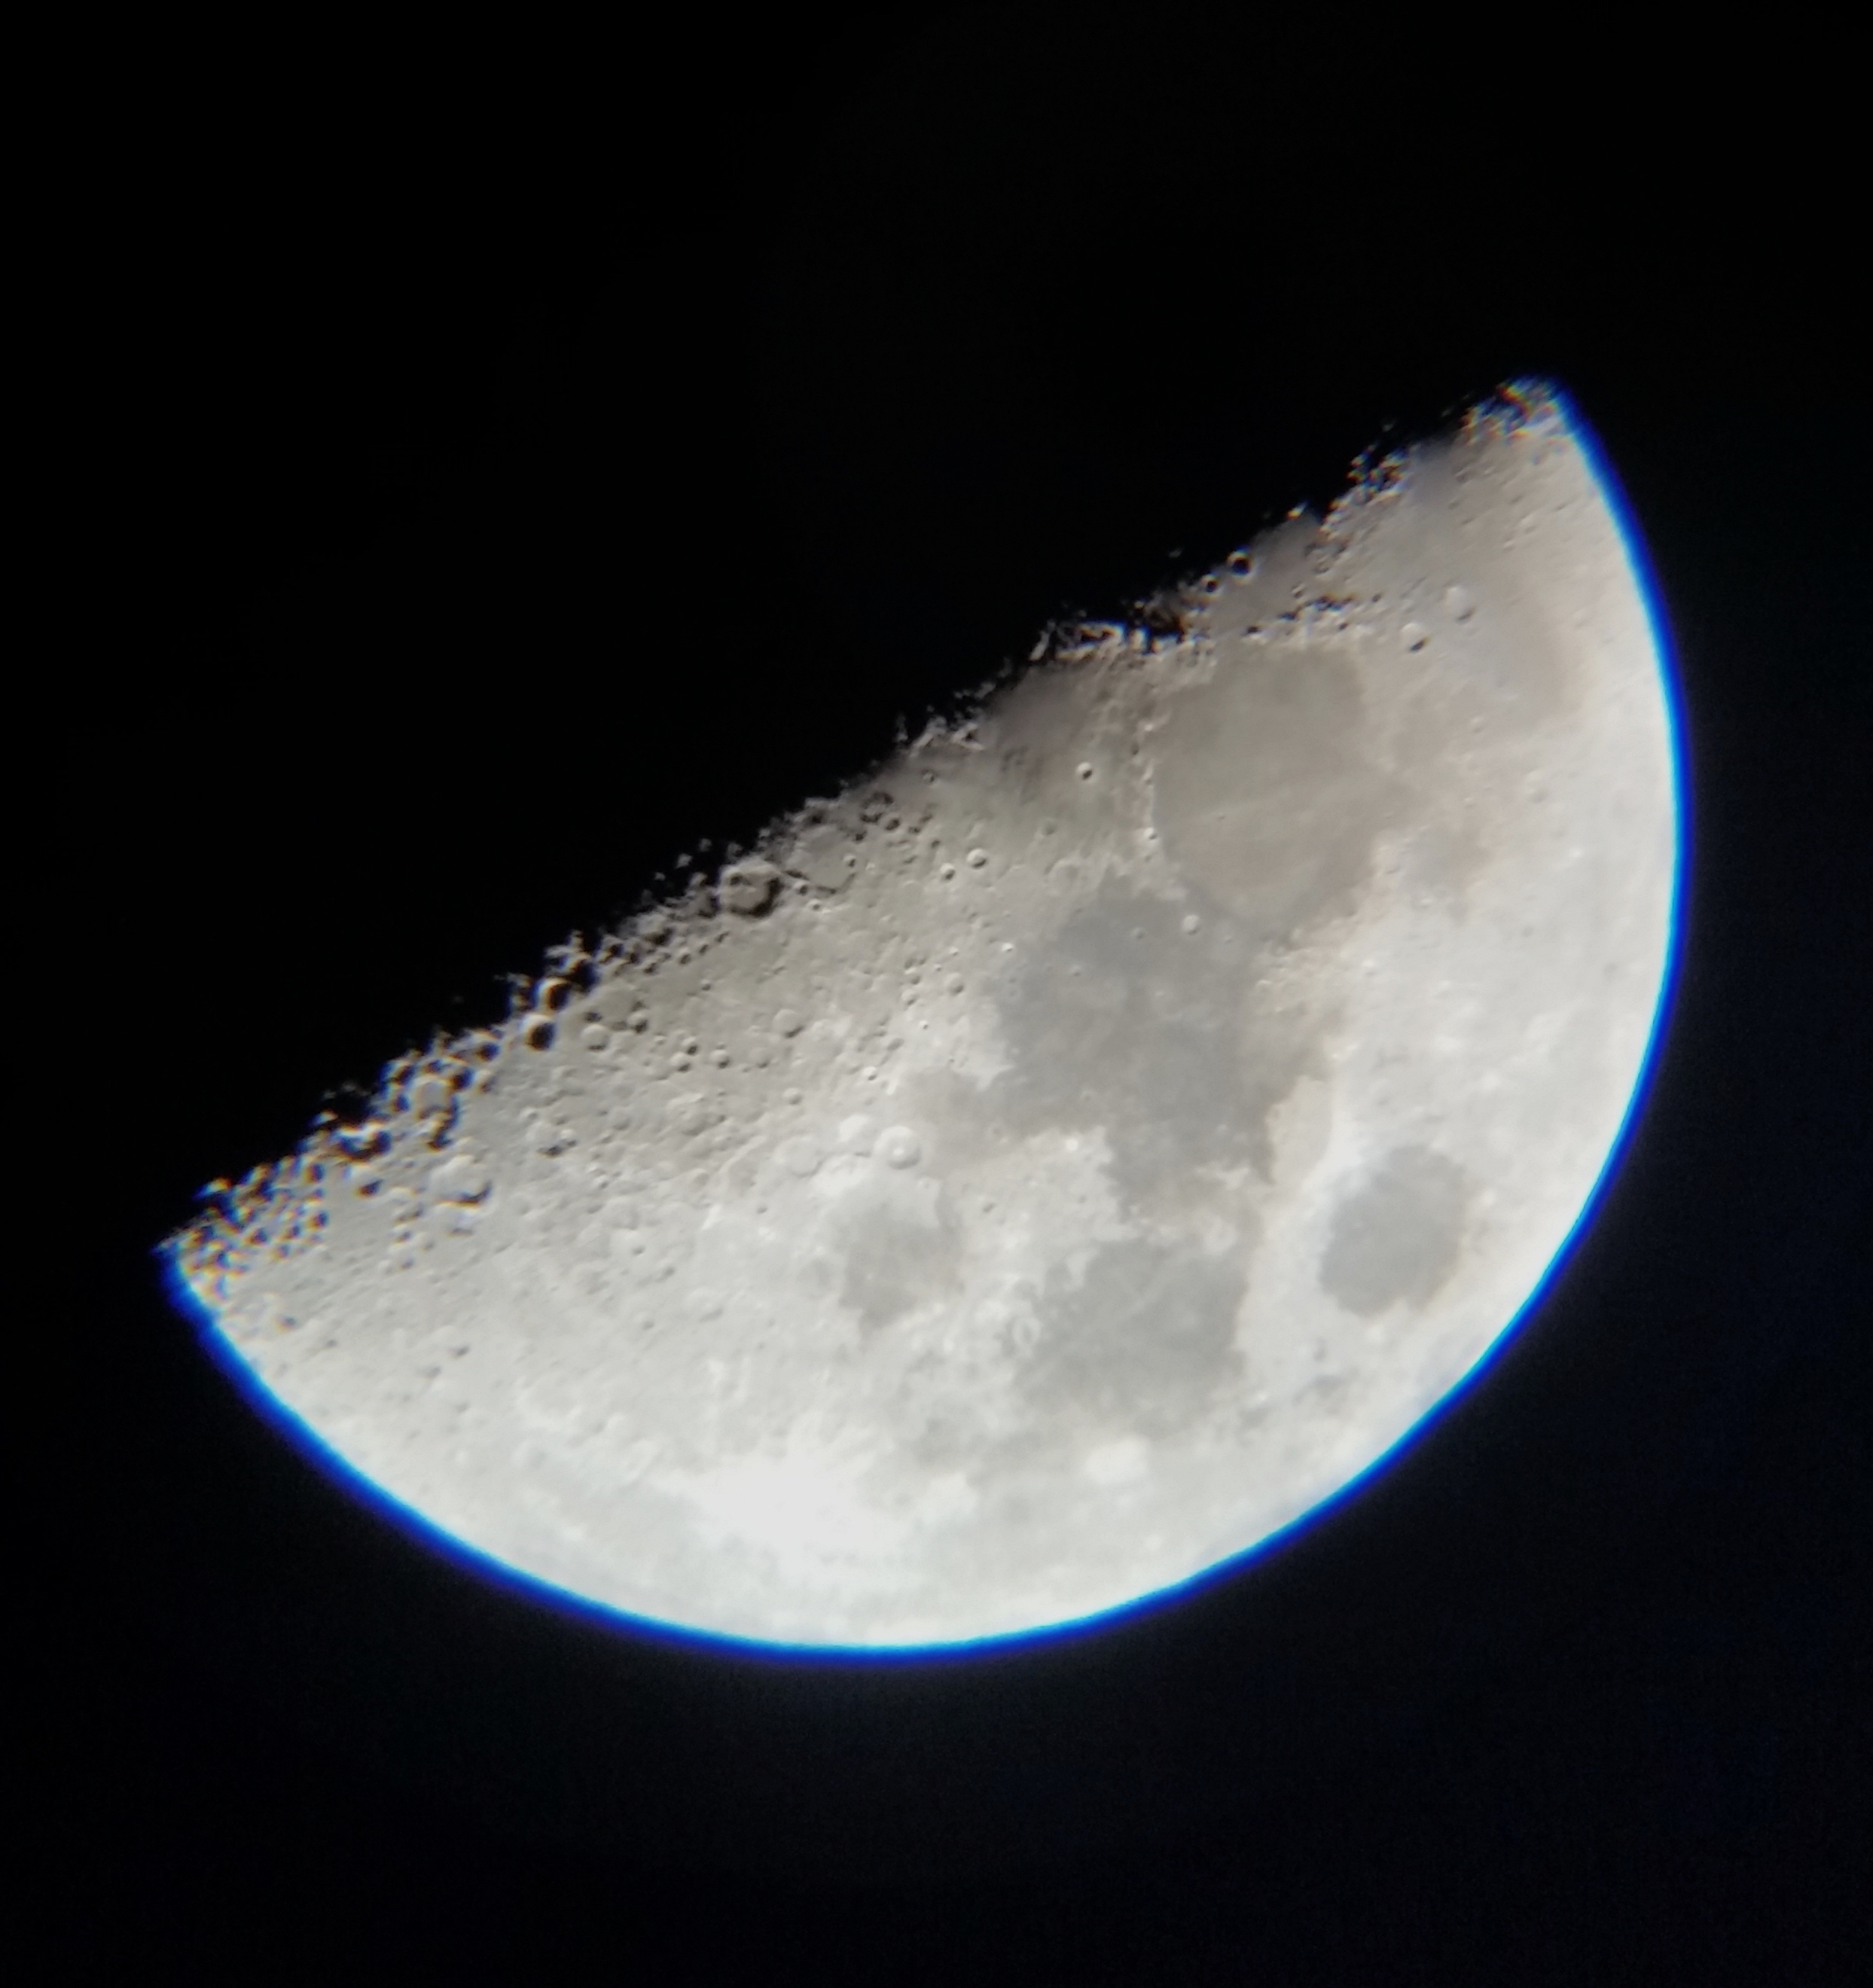
The moon is the easiest celestial object to take pictures of with your mobile device. Its bright light is comparable to the daytime light levels that camera phones are designed for, and it makes for nice large images, especially for photographs taken through a telescope. If the moon is showing a partial phase, center the telescope on the areas along the terminator, the boundary separating the lit and unlit sides. This is where the most dramatically shadowed terrain is. Each night, the terminator shifts across the moon's face, highlighting new areas.
One type of popular moon picture not taken with a telescope shows the beautiful crescent moon floating above the horizon. Try to take it before the sky is completely dark. If you play with the smartphone camera's settings, you also might be able to capture the unlit portion of the moon, commonly known as earthshine. Handheld operation is not recommended for these shots. Just prop the device against something sturdy, and use a voice command or a few seconds of shutter delay to trigger the shot. You can also play around with the zoom option. The moon seldom looks as large in a picture as it did to the naked eye.
Another popular shot to attempt is the full moon hovering over a city skyline or natural landscape. You'll need to find an optimal vantage point and figure out when to be there to get the perfect shot. Your favorite planetarium app can tell you where the moon will be rising, and how high it will be, on a given date and time.
Get the Space.com Newsletter
Breaking space news, the latest updates on rocket launches, skywatching events and more!
Planets visible to the naked eye — especially Venus, Mars, Jupiter and Saturn — occasionally sit near the moon, because they travel along the same track in the sky as Earth's satellite. As such, you can try for a wide-field picture of the grouping. It's tougher to successfully image planets near a moon that's nearly full because the brightness overwhelms the exposure. However, you can take several exposures with different settings and merge them later in Photoshop. [10 Things You Didn't Know About the Moon]
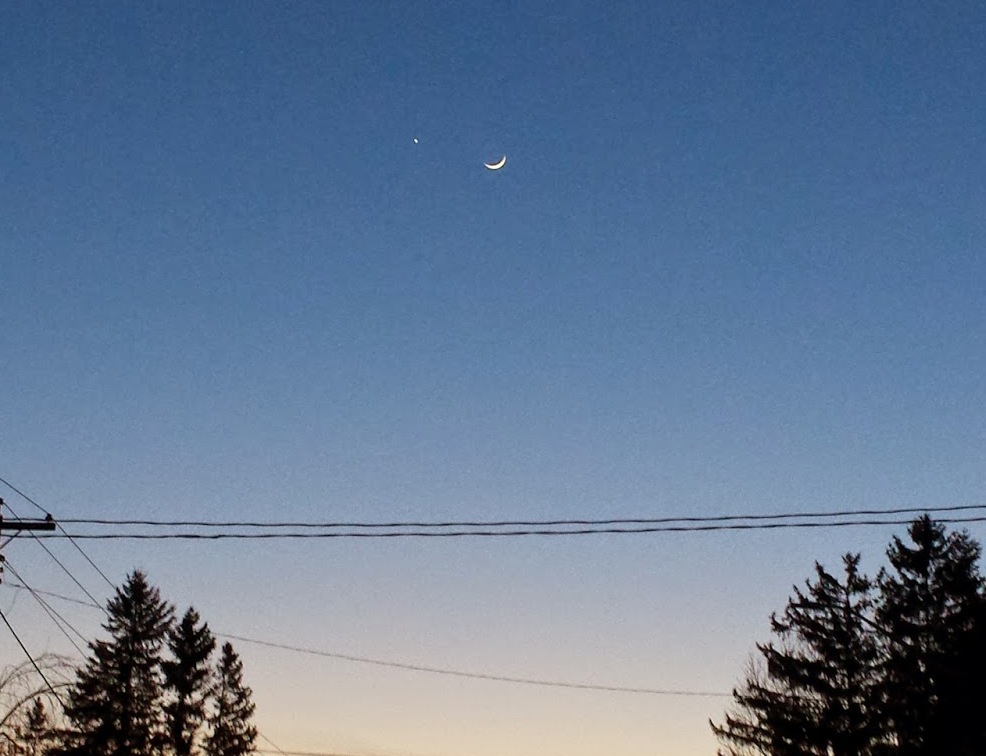
Perfect planet pictures and more
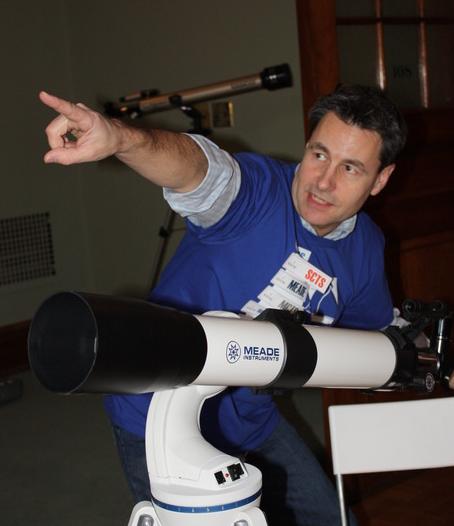
Pictures of planets taken through a telescope are hugely popular at the school star parties I host! The best images are those that show a planet's unique features. When Mars is near opposition, as it has been this spring, it's larger and closer, so it exhibits surface markings and polar caps. At times, though, it's little more than a reddish dot. Other planets put on a real show: It's quite easy to capture Jupiter and its four Galilean satellites that line up with the giant planet's equator, Saturn and its bright ring system, and the partially illuminated disk of Venus.
Bright double stars are also relatively easy targets for beginner mobile device imaging through telescopes. Use SkySafari, or another astronomy app, to find Algieba in Leo the lion, Mizar in the Big Dipper, Ras Algethi in Hercules, and the summer star-party treat Albireo in Cygnus the swan.
Capturing astro-images with your device
The simplest way to shoot a celestial object up close is to hold your device's camera up to the eyepiece of a telescope. This is called afocal photography. The telescope eyepiece does the job of enlarging and focusing the image, and you just capture what your eye saw. If the telescope is sturdy and you have a steady hand, simply holding your device over the center of the eyepiece and tapping the shutter icon should do the trick.
Better yet, you can buy a gadget that firmly attaches your smartphone to the telescope, allowing you to have free hands to tweak the settings. Most of the adapters, including several models from Orion Telescopes, use a padded bracket to grasp your phone from the sides and a clamp that goes around the telescope eyepiece. Only eyepieces of a certain diameter work with it. TeleVue Optics makes one called the FoneMate that affixes to the company's line of eyepieces.
One of the best options I've seen is the iOptron Universal Smartphone Adapter. This unit comes with its own 1.25-inch (3.2 centimeters) eyepiece that fits all standard telescopes. The eyepiece is threaded to allow you to attach standard astronomical color filters that enhance the surface features of the planets.
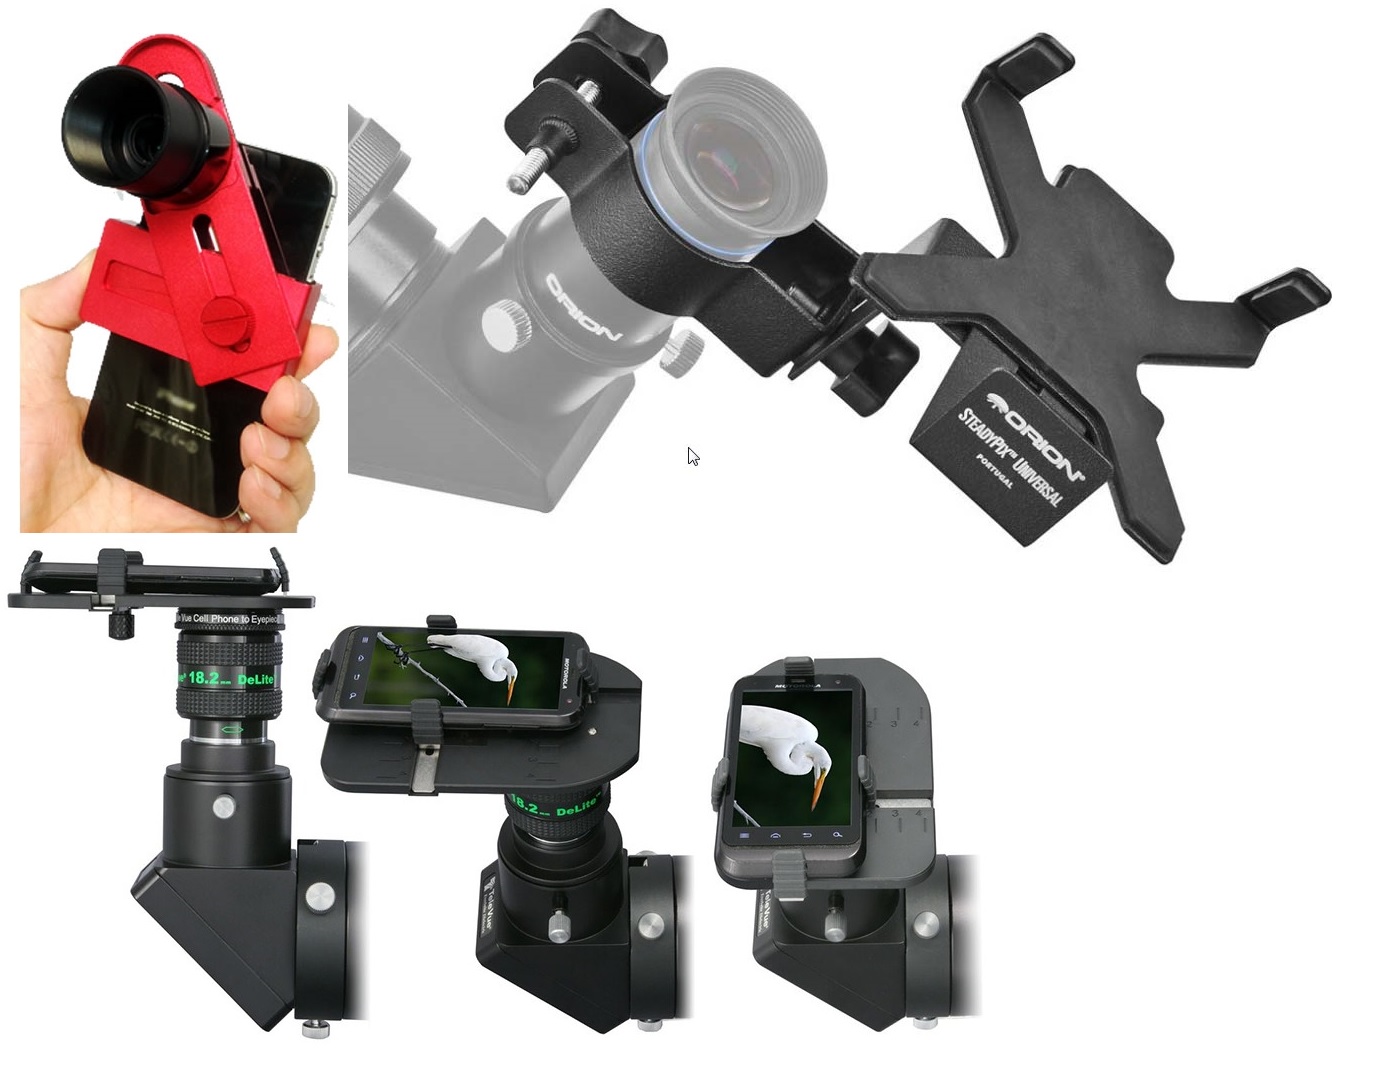
To set things up, first ensure that the object is already centered in the telescope and focused in the eyepiece. Regardless of the adapter you have, install the smartphone so that its camera is centered on the hole for it. This is usually the most finicky step. It's helpful if you can tweak the camera lens position while watching your device's screen.
Your stock camera app may struggle to focus on the object's image. If you can disable autofocus, that will help a great deal. Otherwise, use the "tap to focus here" option that most apps employ. You may also need to adjust the telescope's focus mechanism. The live view on the screen is also helpful here.
Before taking any images, make sure that your flash is disabled, and set the shutter time delay to 2 seconds or so. That lets any vibrations dissipate after you press the shutter. Alternatively, you can enable the touchless voice command. For moon shots, you can generally leave the other default options alone, but feel free to experiment with action mode, night mode, burst mode, etc.
For planet pictures, you will have a small image on a large, black field, so it's important to adjust the app settings for the best results. By default, most stock camera apps set the picture exposure by reading the brightness at the center of the image. Other options include spot metering, where you tap to indicate the part of the image to sense, and matrix metering, where the average of the entire image is used. If the planet is not centered in the field of view, you may find that spot metering works better than the default center metering.
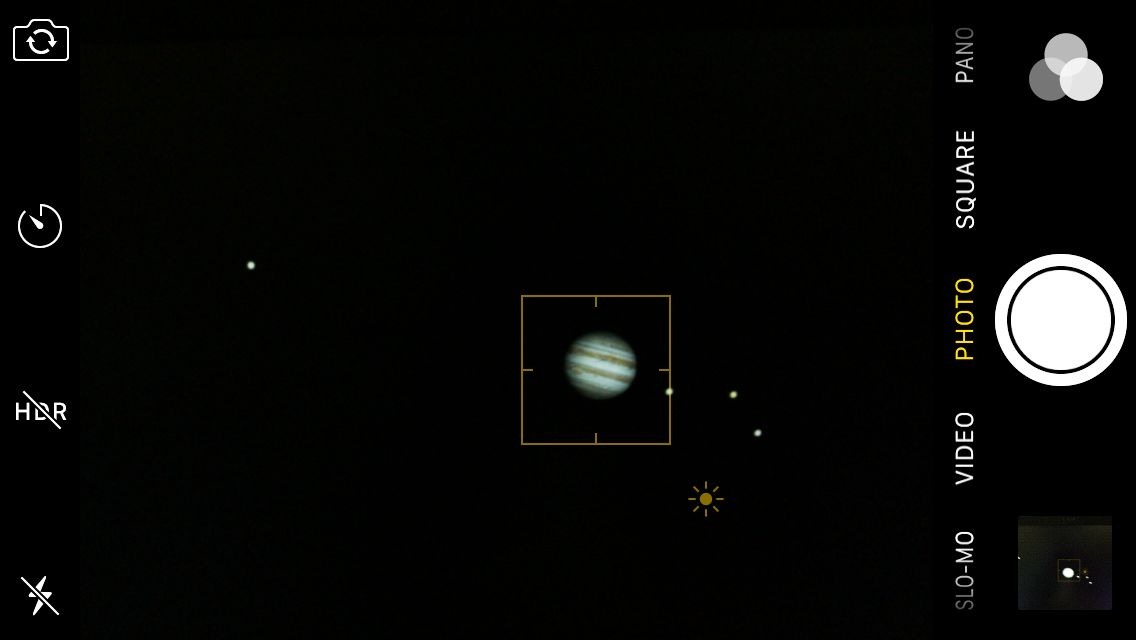
To image the belts on Jupiter and the rings of Saturn, it's usually necessary to reduce the default exposure setting. The camera will think the scene is dark (because most of it is!) and crank up the exposure. You need to override this. On iOS camera apps, tapping an object will center a box around it and show a little sun icon. This is the exposure slider. Drag it down until you see details on Jupiter, or the rings separate from Saturn's disk.
Android camera apps usually have an exposure setting too, but it might take some hunting around to find it. For example, on the popular Samsung Galaxy S5, with the camera app running, tap the gear icon to expand the settings options, tap the gear again to enter camera and video settings mode, and tap again to enter the app's master settings. The Exposure Value control is halfway down the list, and can be slid between +2 (brighter picture) and -2 (dimmer picture).
Astronomers often use a neutral density light filter (either fixed or variable), which absorbs light and dims the photo overall, to reduce the brightness of the moon and planets for observation. If you have access to one, consider installing it in the telescope's diagonal or eyepiece to lower the contrast for better planetary astro-images.
If you are interested in going to the next level of planetary imaging, try capturing a short video of the planet instead of still images. Later, you can import the video file into a free processing application called Registax, and it will examine each frame of your video, select only the best ones and stack them together into a single sharpened image that can be further tweaked in Photoshop. Don't forget that planets are rotating continuously, so videos need to be kept to less than about 1 minute to avoid smearing the surface features.
Going beyond
We've just scratched the surface of astro-imaging. If you have access to a telescope with a proper solar filter attached, you can also take images of sunspots in white light. Solar telescopes show solar prominences in the red wavelength of Hydrogen-alpha light. Contact your local astronomy club to see if it hosts daytime solar observing sessions. [How to Safely Photograph the Sun (A Photo Guide)]
Another excellent way to use your mobile device at a star party is to mount it to a telescope so that a group of people can observe your device's screen live, as a group. Don't forget that your smartphone adapter can also be used through your telescope in the daytime, for birding or other applications.
Now that you have the basics, get out and try some imaging! Feel free to use the comments section to report on your success and share any tips for your particular device. If you post any pictures, feel free to tag me as @astrogeoguy, or send me an email with questions, comments or suggestions for future columns. Finally, don't forget to ask the owner of the telescope before taking any pictures through it. And make sure that you're not monopolizing the telescope while you image. Good luck!
In a future edition of mobile astronomy, I'll discuss some advanced paid apps that take full control of your device's camera, allowing for smart focus control of dim objects, ISO sensitivity boosting, extended exposure times for deep-space object imaging and real-time stacking of images to produce star trails and reveal colors in dim nebulas. Until then, keep looking up!
Editor's note: Chris Vaughan is an astronomy public outreach and education specialist, and operator of the historic 1.88-meter David Dunlap Observatory telescope. You can reach him via email, and follow him on Twitter as @astrogeoguy, as well as on Facebook and Tumblr.
If you snap a stunning space photo with your phone and would like to share it with Space.com and our news partners for a possible story or image gallery, send images and comments to managing editor Tariq Malik at spacephotos@space.com.
This article was provided by Simulation Curriculum, the leader in space science curriculum solutions and the makers of the SkySafari app for Android and iOS. Follow SkySafari on Twitter @SkySafariAstro. Follow us @Spacedotcom, Facebook and Google+. Original article on Space.com.
Join our Space Forums to keep talking space on the latest missions, night sky and more! And if you have a news tip, correction or comment, let us know at: community@space.com.
Chris Vaughan, aka @astrogeoguy, is an award-winning astronomer and Earth scientist with Astrogeo.ca, based near Toronto, Canada. He is a member of the Royal Astronomical Society of Canada and hosts their Insider's Guide to the Galaxy webcasts on YouTube. An avid visual astronomer, Chris operates the historic 74˝ telescope at the David Dunlap Observatory. He frequently organizes local star parties and solar astronomy sessions, and regularly delivers presentations about astronomy and Earth and planetary science, to students and the public in his Digital Starlab portable planetarium. His weekly Astronomy Skylights blog at www.AstroGeo.ca is enjoyed by readers worldwide. He is a regular contributor to SkyNews magazine, writes the monthly Night Sky Calendar for Space.com in cooperation with Simulation Curriculum, the creators of Starry Night and SkySafari, and content for several popular astronomy apps. His book "110 Things to See with a Telescope", was released in 2021.

