Shooting the Moon Part 2
The moon is the hardest working object in the night sky. Unlike the planets that hide close to the sun for months and wallow in the lowest reaches of the ecliptic for years at a time - the moon is always there for you. It is beautifully positioned for picture taking much of each month. And during those brief times when it lies behind the sun you can always spend some hours at the eyepiece looking for dim fuzzy stuff!
Through a telescope, the moon is more fun than Google Earth. As you zoom in with higher magnification new landscapes are revealed and a limitless supply of features - craters, rimae, domes - are revealed. To capture a detailed close-up of the moon using a long effective focal length you will need a telescope and a mount that tracks the night sky. A camera capable of capturing streaming video (a webcam or dedicated planetary imaging camera) is relatively inexpensive, simple to set up in the field and perfectly suited for lunar imaging at high power. A basic 640x480 pixel chip is fine. Larger chips will display a wider field of view but will be more expensive and require a fast processor to handle the huge stream of data at 30 or 60 frames per second.
Like a trip to the Louvre, the moon at high power will offer more than you can see in one visit. It pays to plan ahead. Your session will be most rewarding on a night when the seeing is steady. Find a good weather resource (the Clear Sky Clock is a good internet site to bookmark) and learn the patterns at your location. Often you will find windows of good seeing just after sunset and before sunrise. Store your telescope in an unheated location so it will be thermally stable and ready for imaging at short notice. Don't forget to practice with your imaging set-up in the daytime. Settings for gain, shutter and gamma can be confusing. You don't want to be figuring this out in the dark as a patch of perfect seeing drifts overhead. Learn to interpret the histogram in your camera's capture software and use it to guide your exposure. Too often an image that looks great on screen in the dark of night is badly underexposed when viewed the next day.
Planetarium software like Starry Night or the on-line resources at Space.com help you to plan ahead by showing which lunar features will be visible on any day in any year. I always start a lunar imaging session with some relaxed observing at moderate power. This gives me a sense of the seeing and a first hand look at the features best placed that night. I choose my magnification (adjusting the native focal length of my scope with various barlows) based on this visual assessment. I check my mount tracking too. You don't need a dead nuts polar alignment, but if you have significant drift during capture you will have to crop the image down later on.
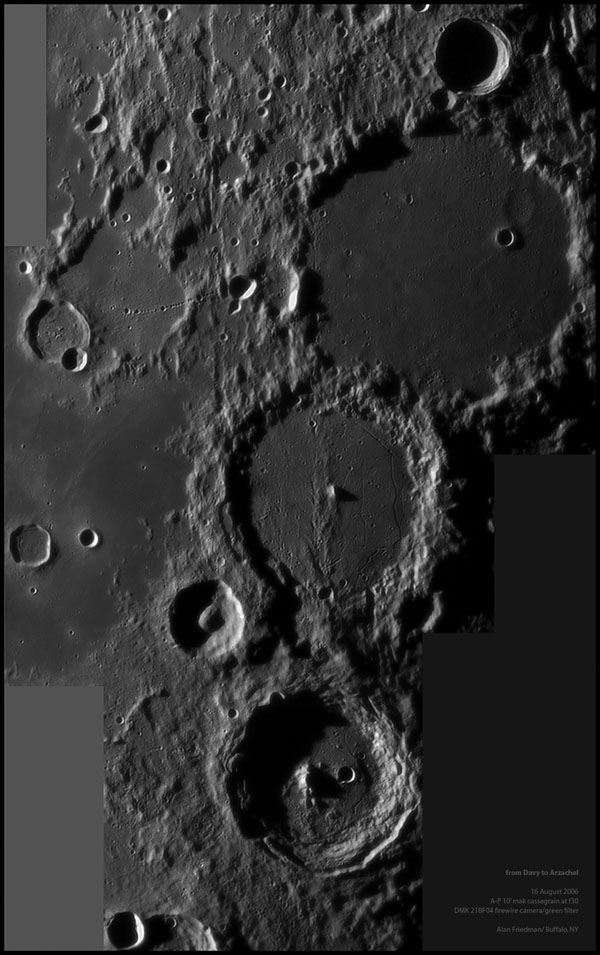
Even large lunar craters will fit in the field of a small webcam chip at high magnification. Crater portraits are a great place to get your feet wet. Stepping out to a wider field of view can create a stunning panorama. This can be accomplished by reducing the magnifcation (a good plan if the seeing is poor) or by moving the camera and taking several adjoining streams to be combined later into a large mosaic. Study the area around a prominent feature by panning the mount to plan your composition. When preparing a mosaic, I like to orient the camera so that the keypad buttons move the mount horizontally and vertically through my intended mosaic field. This helps me to minimize gaps in data and voids in the final assembled picture. A color filter in the light path will magically help stabilize the seeing. A red filter is the most effective in fair to average conditions and is used by most serious lunar imagers. If the seeing is good, try a green filter. It will provide a similar effect with improved resolution over the red.
The moon is such a rich subject - where to begin filming?! The eye is always drawn to the lunar terminator, where contrast between shadows and sunlit highlights are most dramatic. Here subtle changes in surface elevation are accentuated; molehills become mountains. While this is a great location to scout for photo opportunities, images captured in the line between lunar night and day can be notoriously difficult to process. Consider moving away from the terminator to an area of higher sun angle. Pictures centered here will have a wide dynamic range that stands up well to contrast enhancement with image processing tools such as unsharp mask. Images that include the lunar limb and the blackness of space can also be spectacular, giving a sense of perspective and that "coming in for a landing" feeling. The edges of lunar maria, where smooth, dark, craterlet pocked volcanic floes abut rugged lunar highlands, are another excellent choice.
You can quickly get lost in the wealth of lunar detail, filling all available space in your computer hard drive before you know it. To me, a stash of great lunar video is money in the bank, to be saved and savored during those rainy days when image processing is the only astronomy activity possible. A portable hard drive is good insurance that you will run out of night before you run out of memory.
Get the Space.com Newsletter
Breaking space news, the latest updates on rocket launches, skywatching events and more!
Lunar imaging today is undergoing a renaissance as new cameras and processing techniques yield images of incredible resolution and realism. If you find yourself bitten by the bug, I would recommend a copy of the gorgeous new edition of the Atlas of the Moon by Antonin Rukl. A web search will bring up many excellent resources - including searchable databases of Apollo mission images that are archived for research. Perhaps the most enjoyable of all is LPOD (the Lunar Picture of the Day). Here you will find the finest amateur and professional images annotated with fascinating copy by Dr. Charles Wood. It's been updated every day for years and hasn't run out of craters yet!
More to Explore

Join our Space Forums to keep talking space on the latest missions, night sky and more! And if you have a news tip, correction or comment, let us know at: community@space.com.
