How to edit aurora photos
Our guide on how to edit aurora photos will help you bring out the best in your pictures.
Learning how to edit aurora photos is a necessary skill if you’re trying to capture the nuanced colors of the northern lights. You’ll first need to make sure you’ve got the best pictures possible with your camera – and we have a guide on how to photograph the aurora, if you need advice on this – but editing images is very much an important part of the process, too.
When you’re shooting, you’ll want to set your camera to RAW to capture as much data in your image as possible. Then you’ll need to upload these images to some kind of editing software. We've written extensively about the best photo editing apps for astrophotography – but if you’re in a hurry, our top recommendations are Adobe Lightroom and Adobe Photoshop CC, which come with all the tools you’ll need to tweak your night sky images. There are some lower cost options too, like Affinity Photo, which are great if you’re on a budget.
How to edit aurora photos: Preferences
How you edit your aurora photos is a personal preference, and you may not wish to edit them at all. But in doing so you can enhance an image if you haven’t captured a scene as you had hoped in camera. You may also wish to make certain aspects pop. Whether it’s because the exposure was too dark or too long, or if you wish to make it less noisy or just adjust the white balance, you can learn how below.
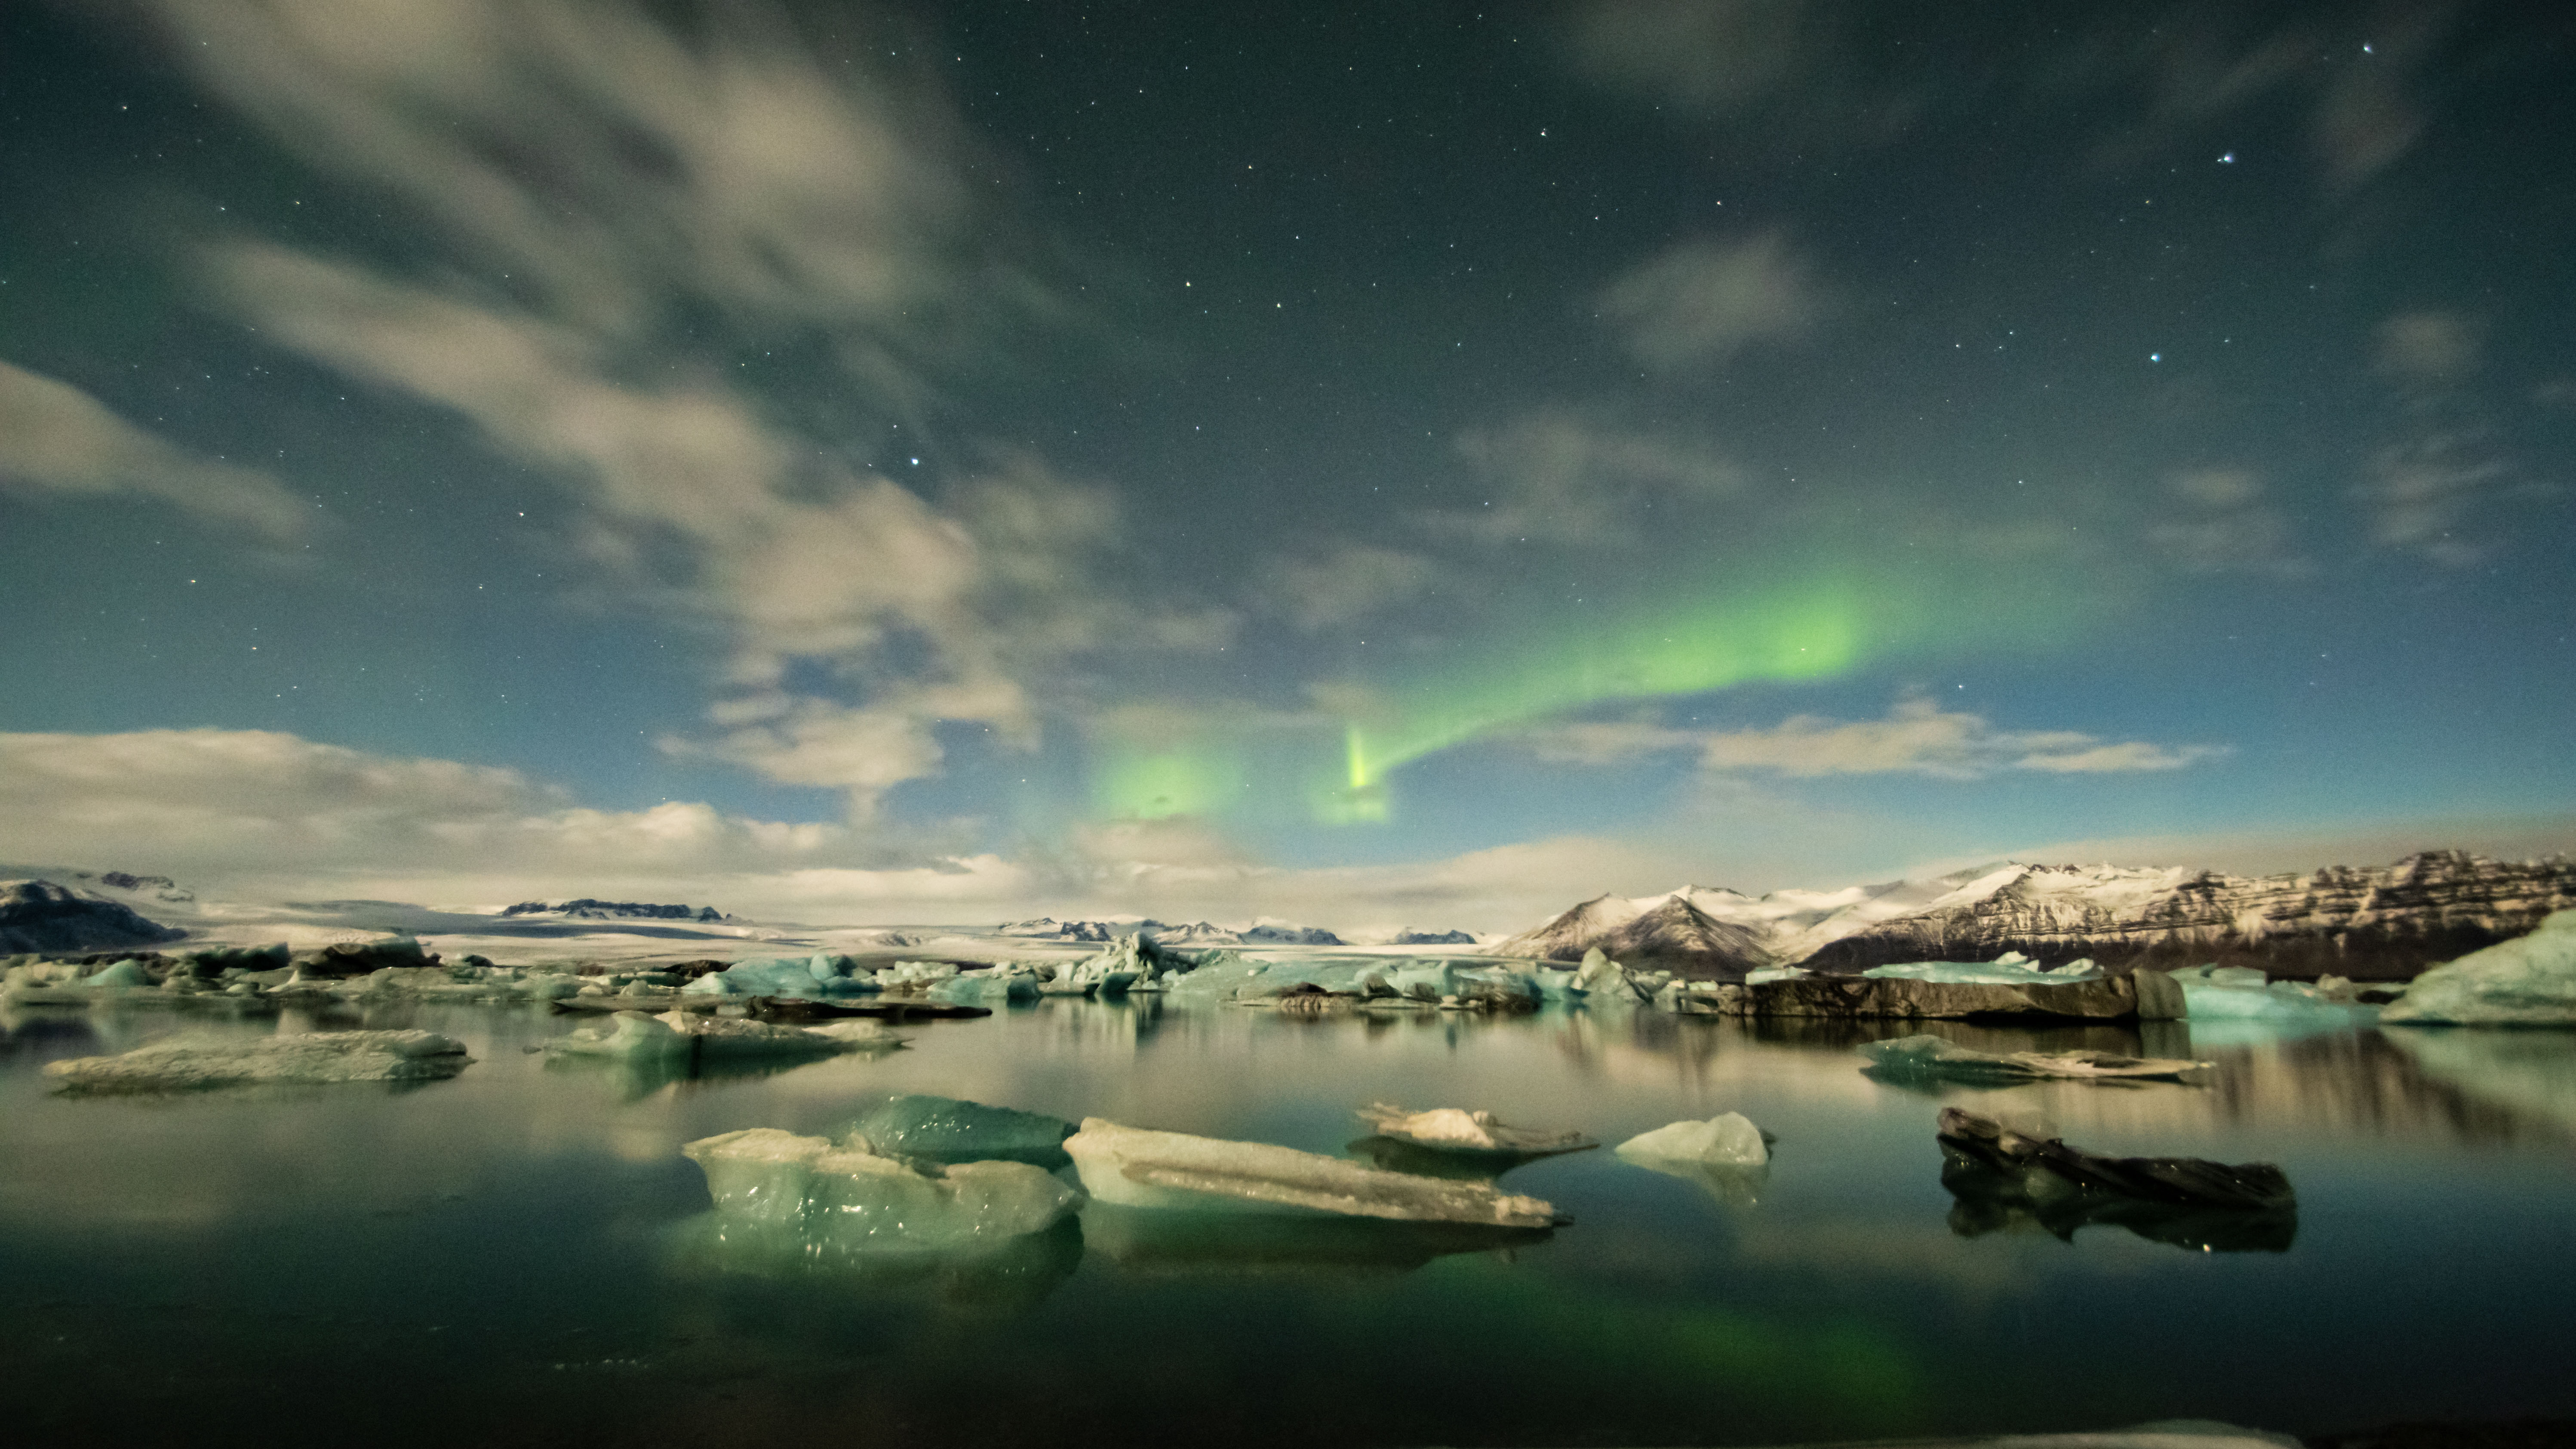
In this guide, we’ll show you how we edited an aurora photograph captured at Jokulsarlon, Iceland under a nearly full moon. We used Adobe Photoshop Lightroom classic and captured the photo on a Canon 80D with a Tamrom 10 -24mm Lens at 1omm, f3.5, ISO 2000, for 8 seconds. (If you've not yet set out on your northern lights adventure, make sure you see our recent article on the best equipment for aurora photography.)
We also used the white balance tungsten mode when shooting. We find that tungsten cools down the scene giving it a blue tint, which was useful in this scenario as the moonlight gave an orange tint to the clouds and we wanted to shoot with cool tones to go with the glacial lagoon scene. We will warm up the image in post processing.
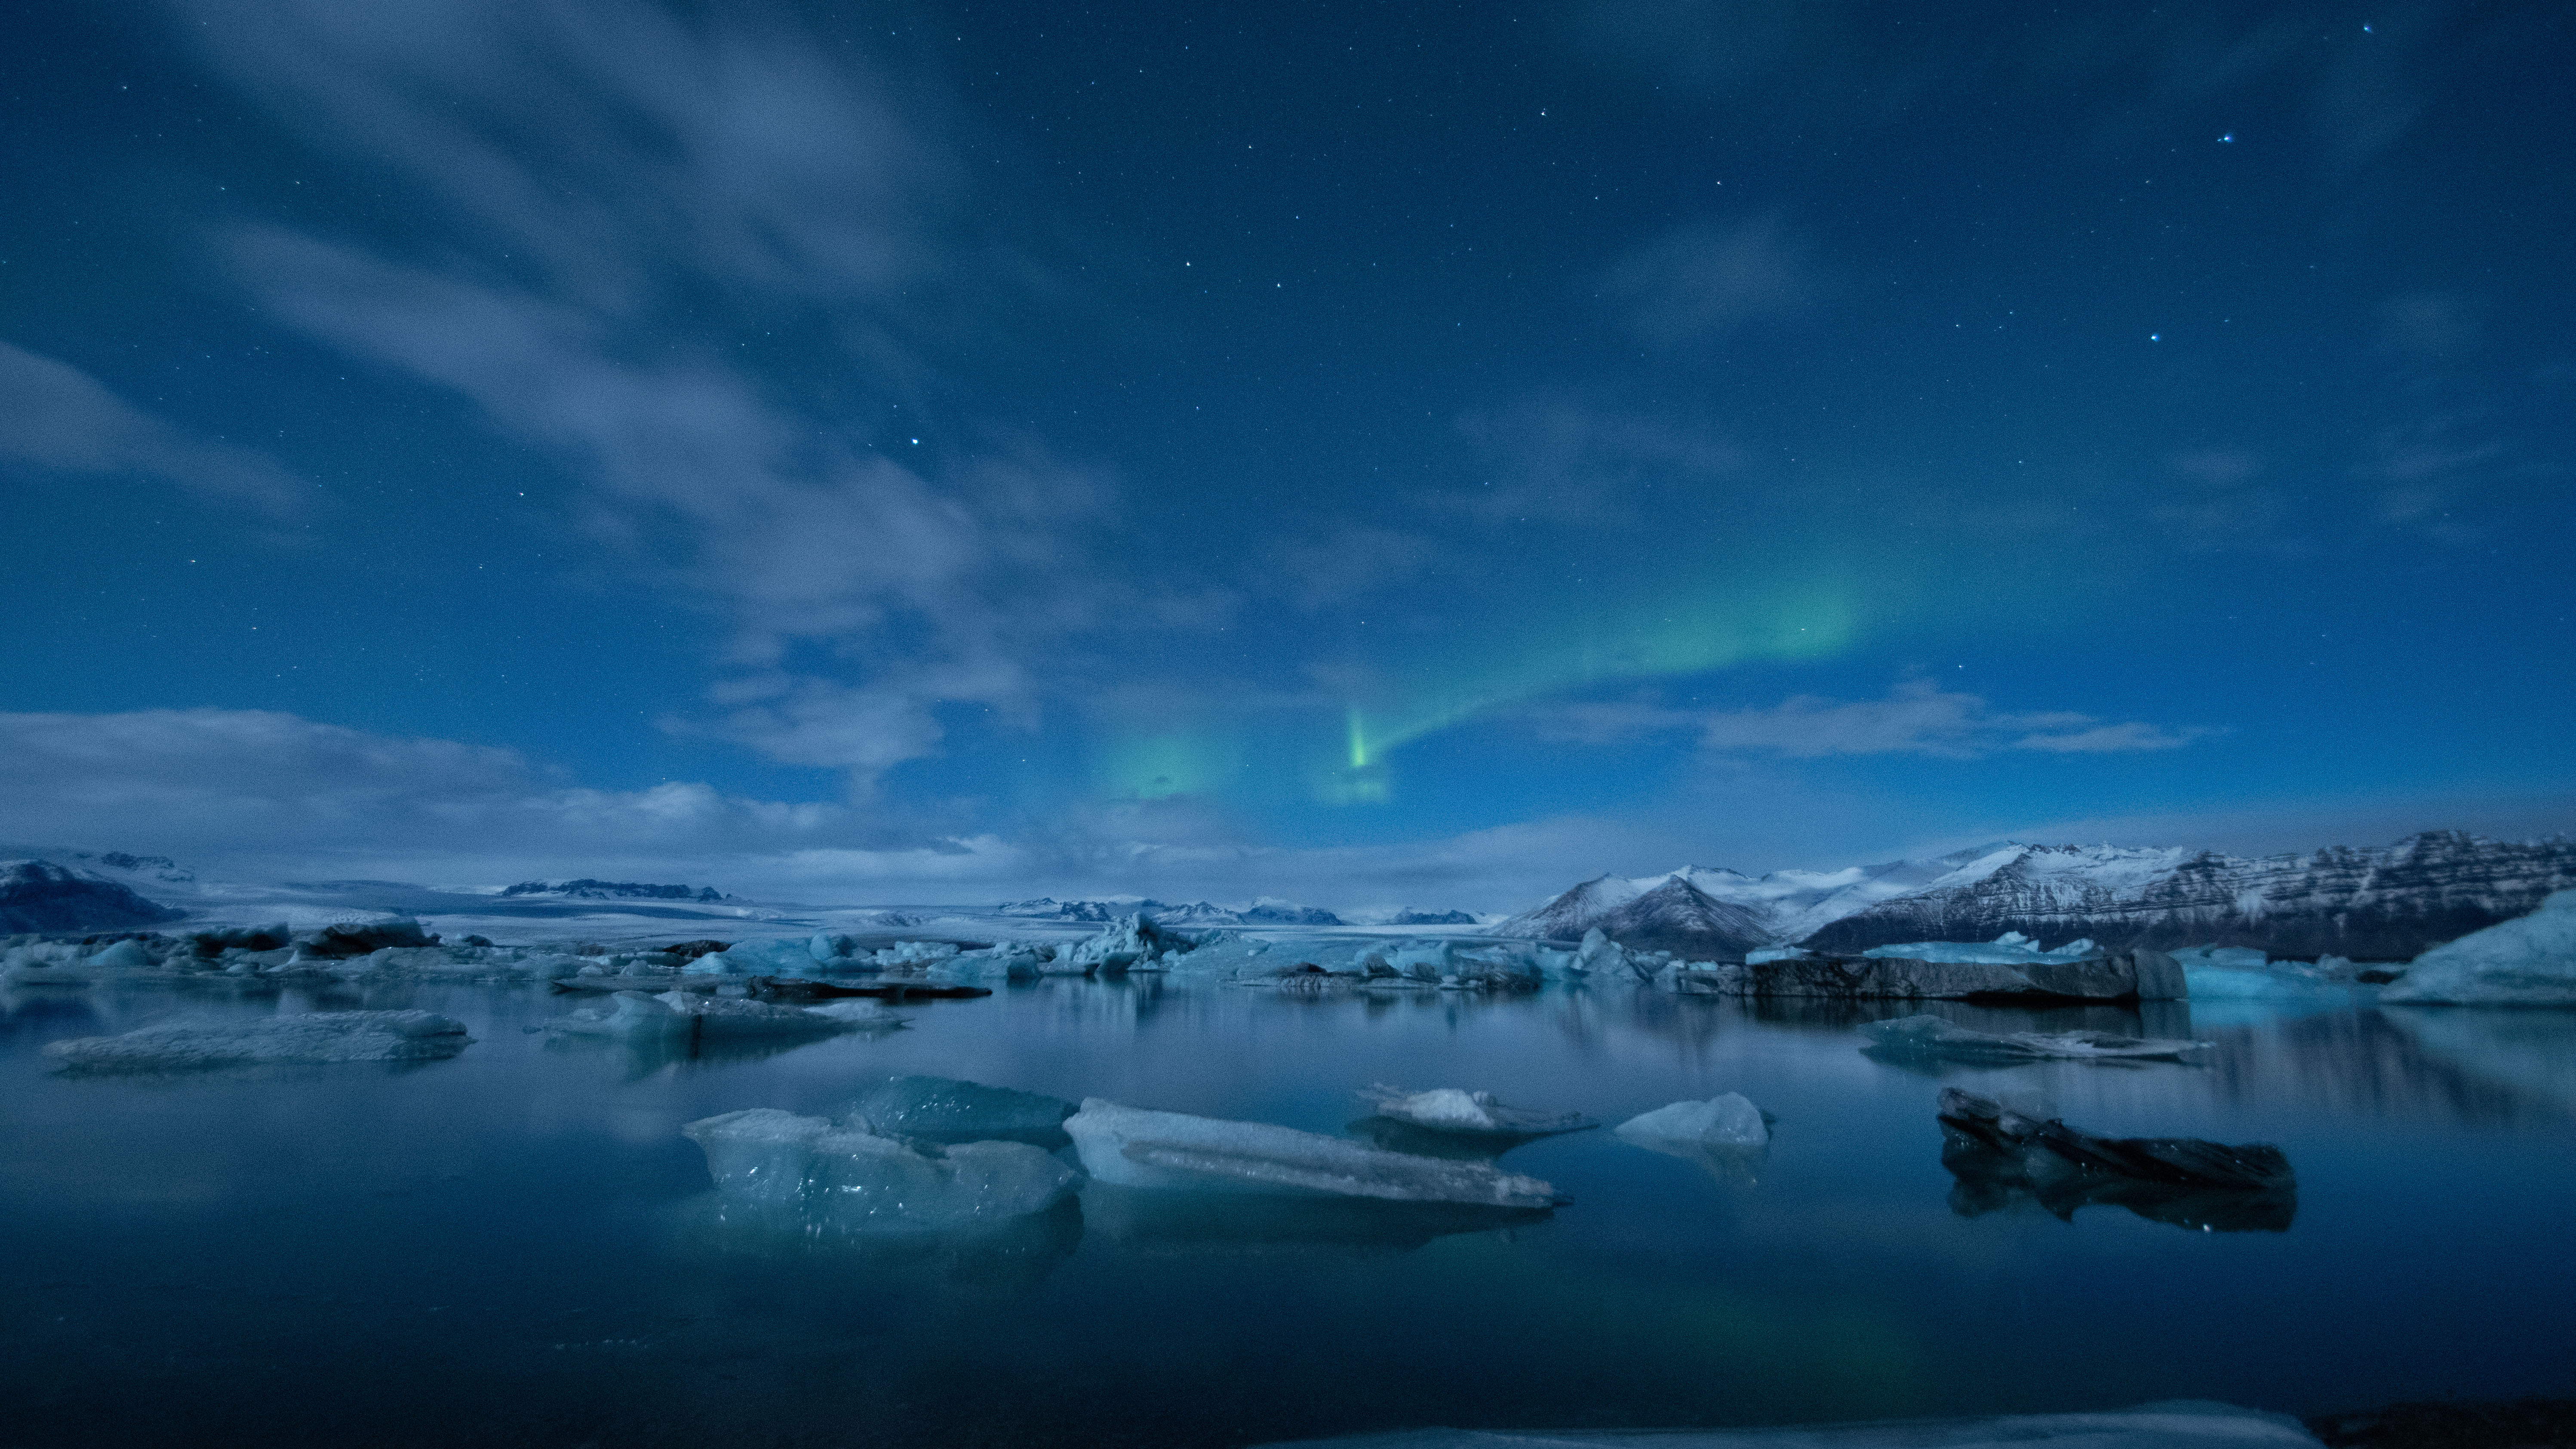
Before

After
It really doesn’t matter what white balance you use as the color of the night sky will be influenced by things like how dark it is and the presence and strength of the aurora. So, pick whatever balance you like and try it. We often shoot in tungsten as we find it useful for shooting near light pollution, reducing that orange light glow.
We like to keep our northern lights images natural looking, to show how it looks to the naked eye and not over saturate the colors. But there is no right or wrong way to edit your photos, it is a personal preference, so edit to your own tastes. We encourage you to explore the settings in camera and in editing software like Lightroom, Photoshop and GIMP.
How to edit aurora photos: The basics
The first thing you’ll want to do when editing is to check your image straight. A small adjustment can usually do this; on Lightroom, you just need to use the spirit level on the left hand side of the screen. Our next step with this particular photo was to warm the temperature up a bit to reduce the coolness of the tungsten white balance. For the above, we went all the way up to 5800 on the temperature slider, but we didn’t touch the green/pink tint.
We then like to brighten the picture, too. It is worth remembering that when you look at your photos on screen, they are backlit, but this will not be the case if you wish to print your images. In this image, we increased the exposure to +0.70. You can compare your image to a white or black background by pressing L on your keyboard to see how you may want to adjust dark/highlighted areas of the image.
If you have overexposed your shot, drop the exposure and you should be able to bring your image back. (If you shoot in RAW, having that increased image data can save you here). We adjusted the contrast to +35 on this picture to make the icebergs and clouds pop.
We did not bring up the blacks in these images as this process usually introduces noise, but dark areas can be adjusted with the magic brush if you need – but we'd recommend bringing the clarity down if you're doing that, to reduce noise.
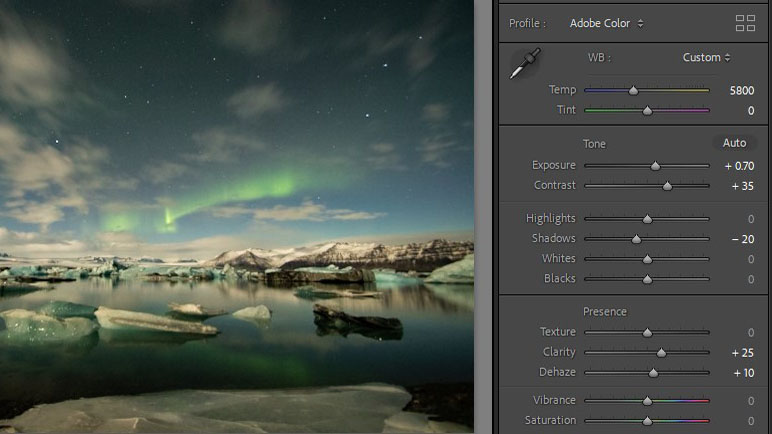
We increased the clarity to +20 on this picture, specifically to bring out the stars and shape of the aurora a little. We also increased ‘dehaze’ to +10 – but it’s important not to overdo the dehaze function, as it can bring in a vignette and alter the colors to look unnatural. It’s useful in smaller increments as it adds a depth and shape to areas of detail like the icebergs, mountains, and stars.
As a rule, we do not recommend touching the overall saturation bar; instead, scroll down to the HSL (Hue, Saturation and Luminance) section and adjust whichever colors you feel are not accurate reflections of how you saw them on the night.
In this image, we brought up the hue to the specific green our eyes saw on the night, increased the yellow, dropped the aqua tones and adjusted the saturation to a level that felt more natural. This can also be done with the brush tool if you only want to target certain parts of the pic. For example, you can isolate the aurora and enhance or dull the colors as you see fit. Remember, personal preference is key! It is your photo after all
How to edit aurora photos: Noise reduction
If you're struggling with noise when you're capturing pics, do have a look at our piece on how to reduce noise in astrophotography. Capturing the image with a lower ISO will also help with this issue, as higher ISO produces more noise.
When we're working on this aspect of our editing, we'll often alter the ‘sharpening’ of the image first. For the picture, we adjusted the 'amount' slider to 30, left the radius at 1.0 and put the 'detail' slider at 25.
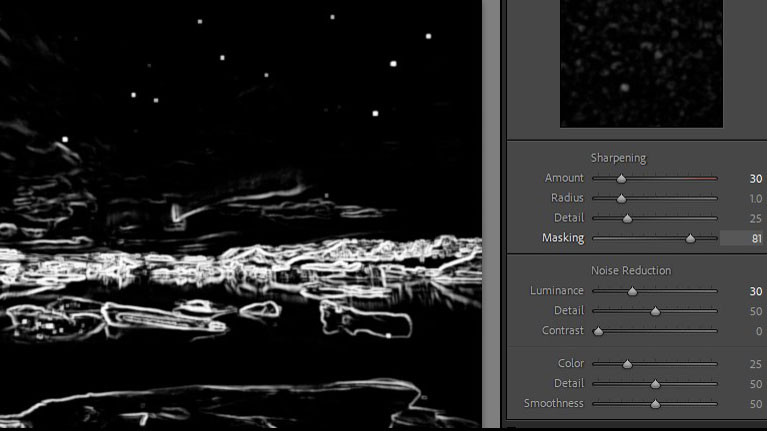
If you hold down alt (on a windows computer) and slide the masking bar you get a preview of how it is sharpening your image. Your image will turn black and white, and you'll see how the feature starts cleaning up the white areas as you increase the slider. We aim to be around 80 on the 'masking' slider, but this will depend on how noisy the image is.
With noise reduction, we use 'luminance' as the main softening tool to reduce noise. Always be careful not to overdo it or you will lose details in your picture.
Explore your editing program and try out all the tools on offer to see what they do. If you want more guidance, have a look through our piece on how to edit photos in Lightroom. Have fun taking photographs and editing them. For now, we wish you clear and aurora filled skies!
Join our Space Forums to keep talking space on the latest missions, night sky and more! And if you have a news tip, correction or comment, let us know at: community@space.com.
Get the Space.com Newsletter
Breaking space news, the latest updates on rocket launches, skywatching events and more!
Hannahbella Nel lives a split life; half the year she’s an aurora guide in the far north and the other half she’s a conservation gardener and freelance writer based in the south west of England. In between she fills her spare time with being a NASA citizen scientist with Aurorasurus, studying space weather and plasma physics. She unwinds with landscape and astrophotography, paddle boarding and hiking the Welsh mountains.
